If you want to add custom icons to your WordPress menus, but don’t want to use a plugin for this in this article I’ll show you how to do it with the help of the Secure Custom Fields plugin and some custom code.
So let’s start – first thins first you need to install the SCF plugin and create a new field group. You can named it Menu icons, after that you have to create an image type field and you can name it Menu icon. The return format of the field should be “Image URL” this is important step so don’t forget it.
Finally you have to set the location rules where you want the field to be displayed and in out case we want the field to be displayed in out Main menu so we have to choose “Menu item” -> “Is equal to” -> Here you have two options: 1. to select All items (this means that the field will be visible through all menus) or 2. to select a concrete menu.

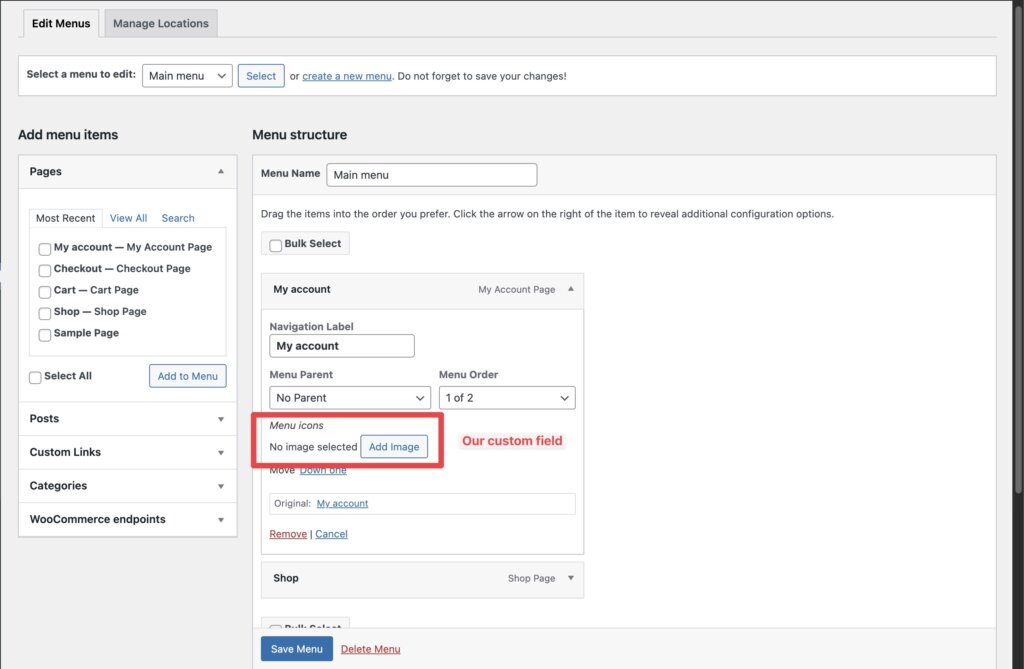
When you are done with these steps you can go to the Menus page and add an icon to your menu items.
But wait we need I little more work to do before our icons are displayed in the front end. Open your functions.php file (or if you use a plugin for code snippets) and paste this code:
/* Function that adds the icon from the menu custom fields to the menu items */
add_filter('wp_nav_menu_objects', 'menu_items_icon', 10, 2);
function menu_items_icon( $items, $args ) {

    if ( $args->menu == "main-menu" ) { //Make sure to change the name of the menu if your's is not called Main-menu
        foreach( $items as $item ) {
            $menu_item_icon = get_field( 'menu_icon', $item );
            if( $menu_item_icon ) {
				$item->title = '<img src="' . $menu_item_icon . '" class="menu-item-icon"></img> <span>' . $item->title . '</span>';
            }
        }
    }

    return $items;
}Code language: PHP (php)
Now your icons should be visible to you menu items and the final step is to add a little CSS to style them, you can use the menu-item-icon to style the icon.